How image diffs work in visual regression testing
How an image diff compares two screenshots pixel by pixel, why anti-aliasing and flaky renders make naive diffs fire on changes no one made, and what fixes it.
 Igor LuchenkovBuilding UI Verify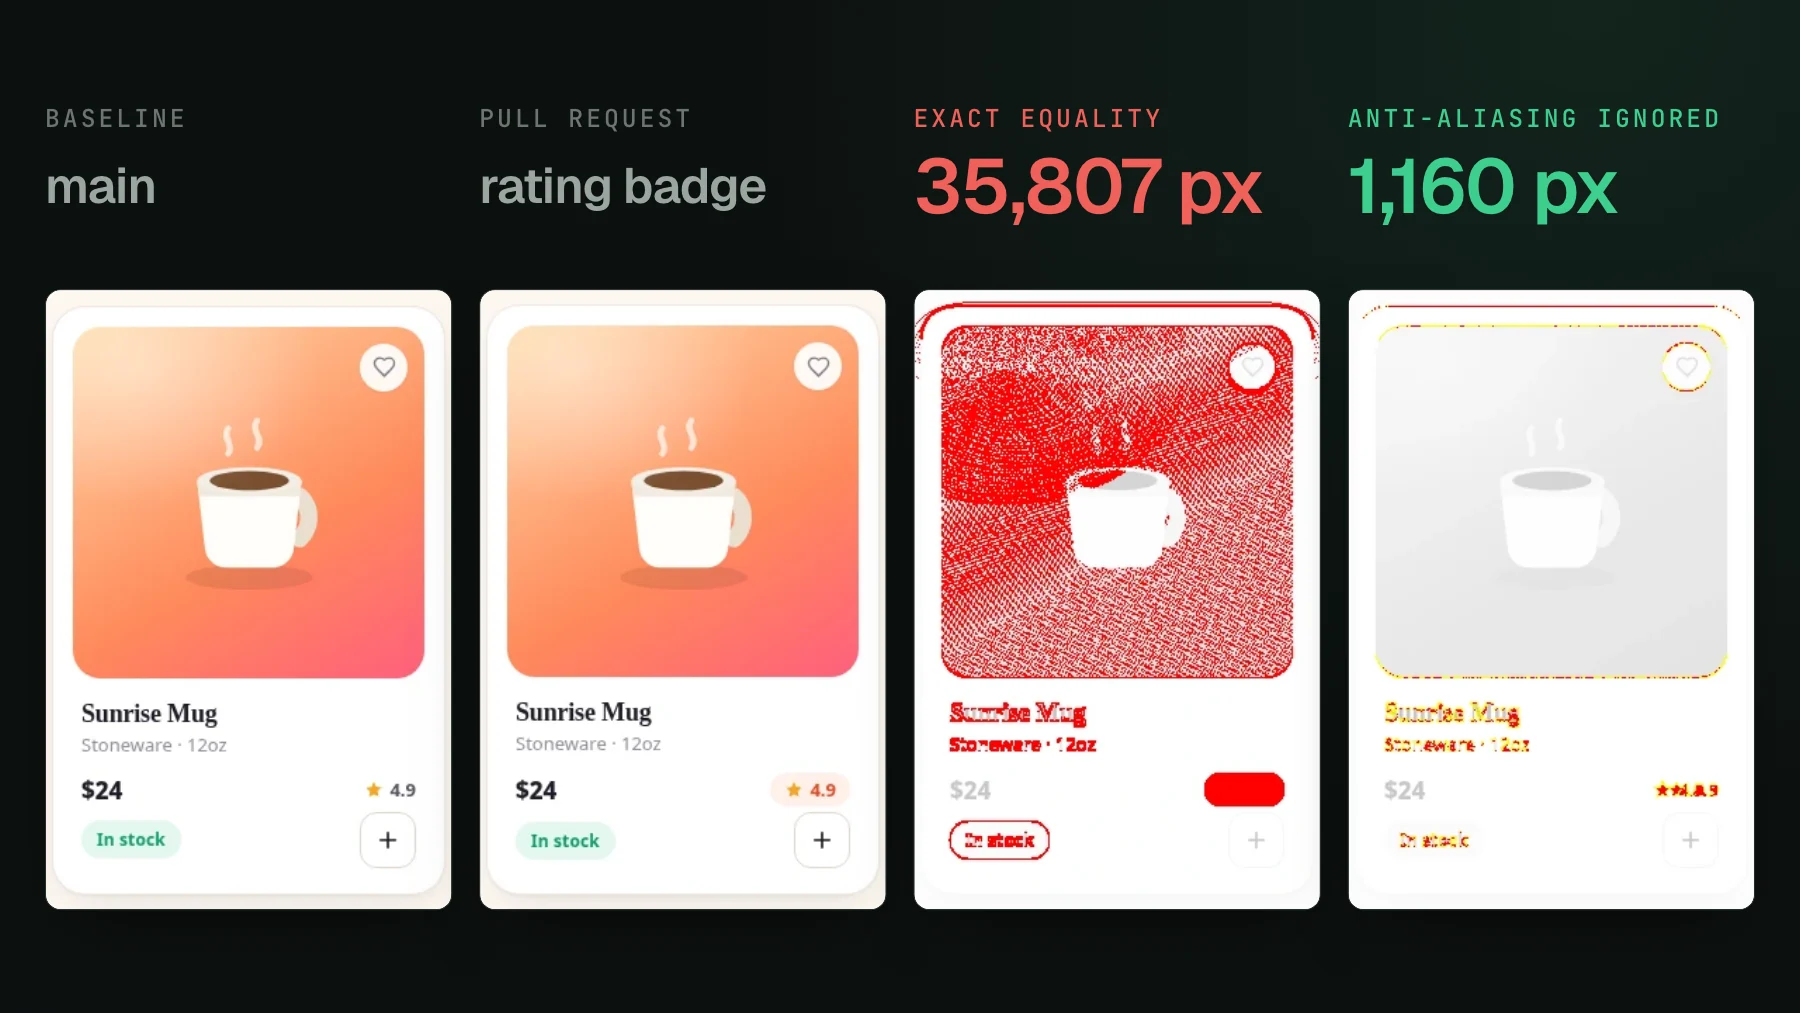
On this page
An image diff tool compares two images and reports what changed between them. In the context of UI testing it takes a before and an after screenshot of the same view, walks them pixel by pixel, and marks every position where the two disagree - usually painting those pixels red on an overlay so a human, or a coding agent, can see the change at a glance. That is the whole job on paper. The reason there is more to say is that a pixel-by-pixel comparison, done the obvious way, is almost useless: it fires on changes nobody made. The gap between the naive version and a usable one is where the real work lives.
What does an image diff tool compare?
At its core the tool holds two images of identical dimensions and asks, for each (x, y), whether the pixel there is the same in both. A pixel is four numbers - red, green, blue, alpha - so "the same" means all four match. Count the positions that differ, divide by the total, and you have a change percentage; collect them into a bounding box and you have a region to spotlight. Everything an image diff reports is built from that per-pixel verdict.
Why does exact pixel equality flood you with false positives?
Exact pixel equality floods you with false positives because two screenshots of the genuinely same UI are almost never byte-identical. It is the naive implementation: a pixel counts as changed if any channel differs by even one, which sounds correct and is a disaster in practice. The dominant reason is anti-aliasing. Every diagonal edge, every curve, every glyph of text is drawn by blending the shape's color with the background across a fringe of partly-covered pixels - that fringe is what makes a letter look smooth instead of jagged. The exact subpixel coverage of that fringe depends on where the shape lands relative to the pixel grid, and that lands a hair differently between two renders. So the interior of a button is stable, but the one-pixel rim around every letter and every rounded corner shimmers. Exact-equality diffs the same text twice and lights up the outline of every character in red.
Sub-pixel rendering makes it worse. On a normal display the renderer can position text and layout at fractional pixel offsets and use the red, green, and blue sub-elements of a physical pixel to fake extra horizontal resolution. A layout that shifts by a third of a pixel - well below anything a person could see - repaints a different anti-aliased fringe across a wide swath of the screen. Font hinting, GPU vs software rasterization, even a different driver version all nudge these fringes. None of it is a change to your UI. All of it trips exact equality. Run a naive diff over a real page and the report is a haze of red along every edge, with the one actual regression buried somewhere inside it.
This is why serious diffs work in a perceptual color space rather than raw RGB. Comparing in something like YIQ, which separates brightness from color the way human vision roughly does, lets the tool weight a difference by how visible it actually is and apply a sensitivity threshold per pixel: a faint anti-aliased blend reads as unchanged, a real color swap reads as changed. A good diff also detects anti-aliased pixels structurally and refuses to count them as signal in the first place. That single move - stop treating the smoothing fringe as a change - removes most of the false-positive flood. Render a product card twice, the second time a third of a pixel to the right, and exact equality counts 1,749 changed pixels; pixelmatch with anti-aliasing detection counts 280.
Why a raw percentage threshold is a trap
The tempting next move is a blunt one: allow some percentage of pixels to differ before failing the build. Set the threshold at, say, half a percent and the anti-aliasing haze slips under it and stops nagging you. The problem is that a single global percentage cannot tell a wide-but-invisible change from a narrow-but-real one. Anti-aliasing noise is spread thinly across the whole image, so silencing it means allowing a meaningful fraction of pixels to move. A genuine geometry regression - an icon nudged 2-3px, a heading that shifted a line, a button that grew a few pixels - touches only a small, dense cluster of pixels. Loosen the threshold far enough to hide the font shimmer and that 2-3px shift now falls under the same bar. You have not tuned out noise; you have tuned out the regressions too, and the ones you lose are the subtle geometry bugs that are hardest to catch by eye. On one of our own dashboard pages, nudging the render a third of a pixel changed 0.56% of the pixels, while a real change, two header buttons swapping places, changed 0.064%.
A percentage is a symptom-level fix for a determinism problem. The better fix is to measure how much a view wobbles between two identical renders - its noise floor - and subtract that, so a pixel only counts as changed when it moves by more than the view's own natural jitter. That keeps the tool sensitive to a tight 2-3px cluster while ignoring the diffuse edge shimmer, instead of trading one for the other with a single dial.
Determinism: a diff is only as good as the images it is handed
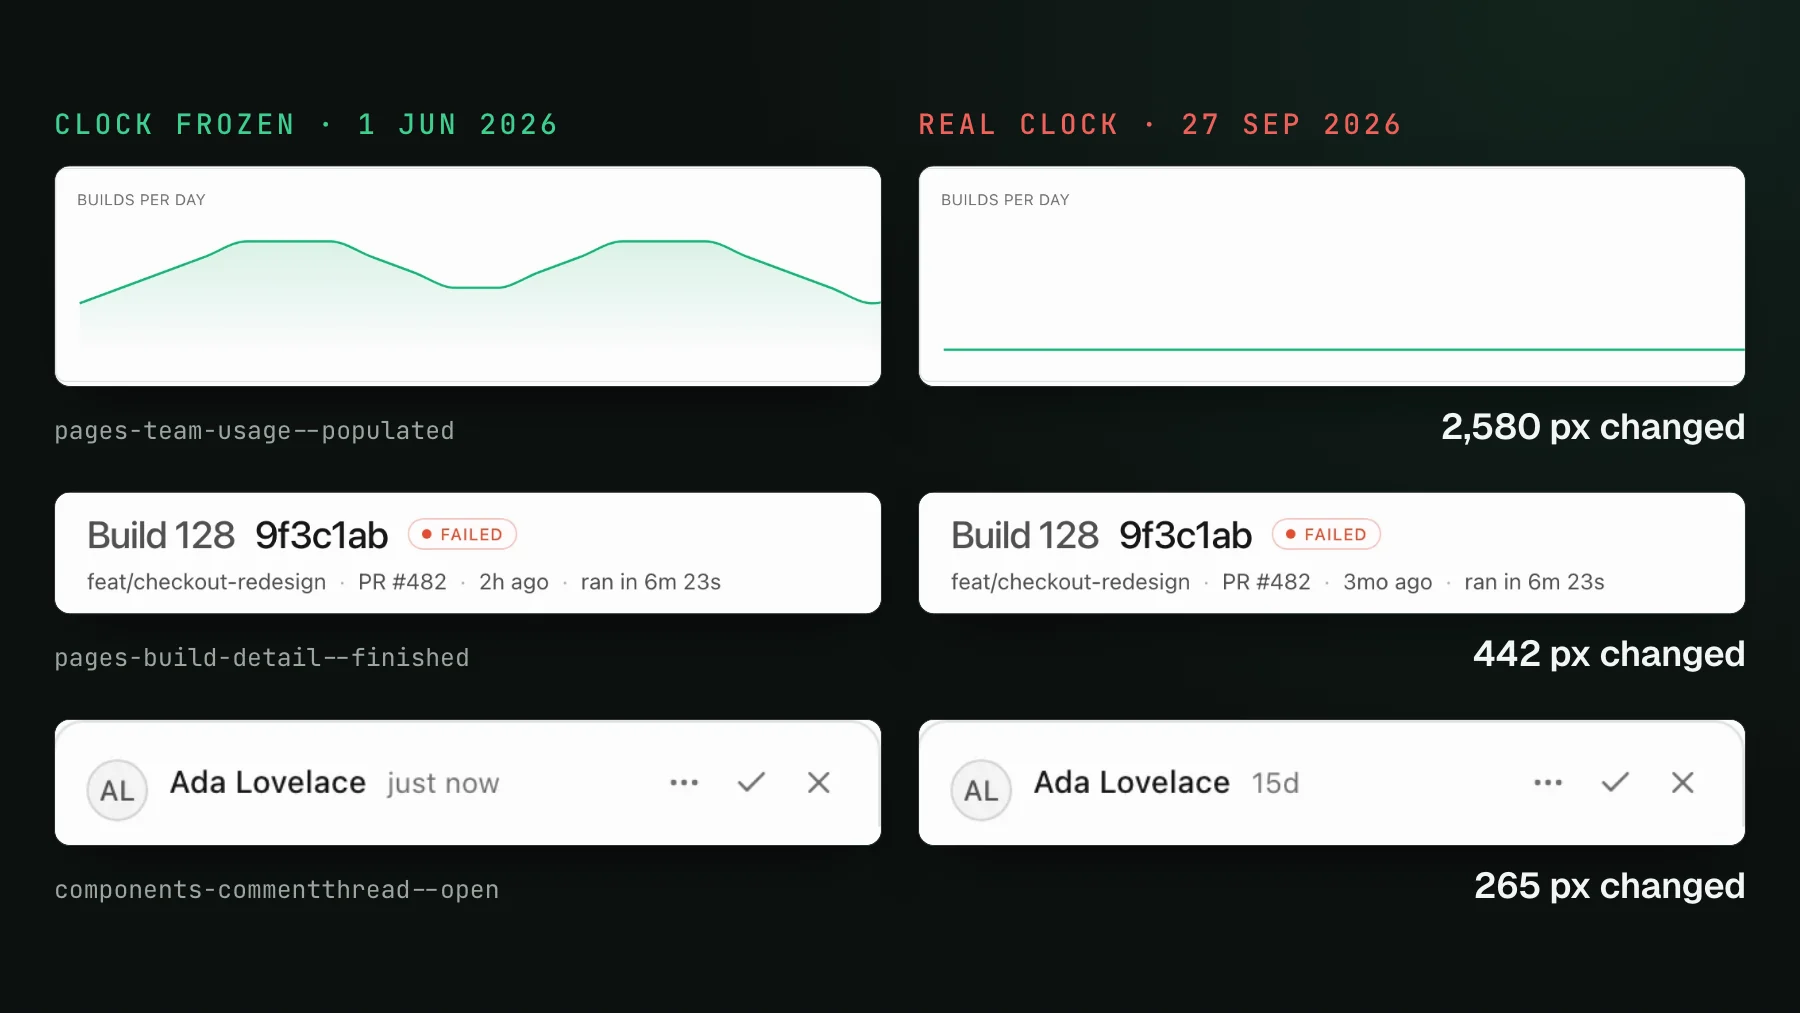
The diff algorithm is the easy half. It compares whatever two images you give it, and if those two images were produced under different conditions, no amount of perceptual weighting will save you - the tool will faithfully report differences that are real in the pixels and meaningless in your UI. So the comparison is only trustworthy when the two screenshots are actually comparable in the first place, which means capturing both in a fixed render environment: the same viewport size and device scale factor, the same color profile, the same fonts loaded before the shot, animations and the clock frozen, and any live or random data pinned. Change the viewport by a pixel or let a web font swap in late and you have manufactured a diff the algorithm is duty-bound to flag. When people call a visual test flaky, the diff is rarely the culprit: the capture drifted between runs, and the algorithm faithfully reported two images that were never comparable. The full checklist lives in deterministic captures, and the flake symptoms map to fixes in fix flaky Playwright screenshot tests.
Where does an image diff fit in visual regression testing?
An image diff on its own is a comparator, not a test. It becomes visual regression testing when you wrap it in a loop: capture a screenshot of each view, diff it against a saved baseline, and judge whether the difference is a real regression or an intended change. Capture is the determinism problem above. Diff is the pixel comparison this post is about. Judge is the decision that used to fall entirely on a human squinting at a red overlay. For the full loop end to end, see how visual testing works and the plain-English screenshot testing explained.
The judge step is where the raw pixel diff stops being the answer and starts being the input. A pixel diff can tell you that a heading moved 12px down; it cannot tell you that it moved because you deliberately added a banner above it. That is a judgment about intent, and it needs the context of the change, not just the pixels. UI Verify runs the deterministic capture and the noise-floor-aware diff for you, then hands the changed regions to an AI judge along with the pull request's title and description, so it can separate an intended change from a regression instead of leaving you a wall of red pixels. The pixel diff finds what moved; the judge decides whether it should have. Point your agent at the setup skill and it wires the whole loop into your existing tests.
An image diff you can trust on every PR
UI Verify pins the render environment, subtracts the per-story noise floor, and puts an AI judge on top of the raw pixel diff - so the changes you review are real, not anti-aliasing. Visual testing for agents, wired into your existing tests.
Start for freeNo credit card required.
Set up visual testing
From no visual tests to a green check on every pull request.