Mobile app visual regression testing
UI Verify turns the screenshots your mobile test run already produces into visual regression tests. Keep using Maestro, XCUITest, Espresso, Appium or any script that saves PNGs: one command uploads the folder, UI Verify diffs each screen against its baseline, and your coding agent sees what its change did to the UI before it opens a pull request. It works for native iOS and Android, React Native, and desktop apps, with no SDK to add and no browser involved.
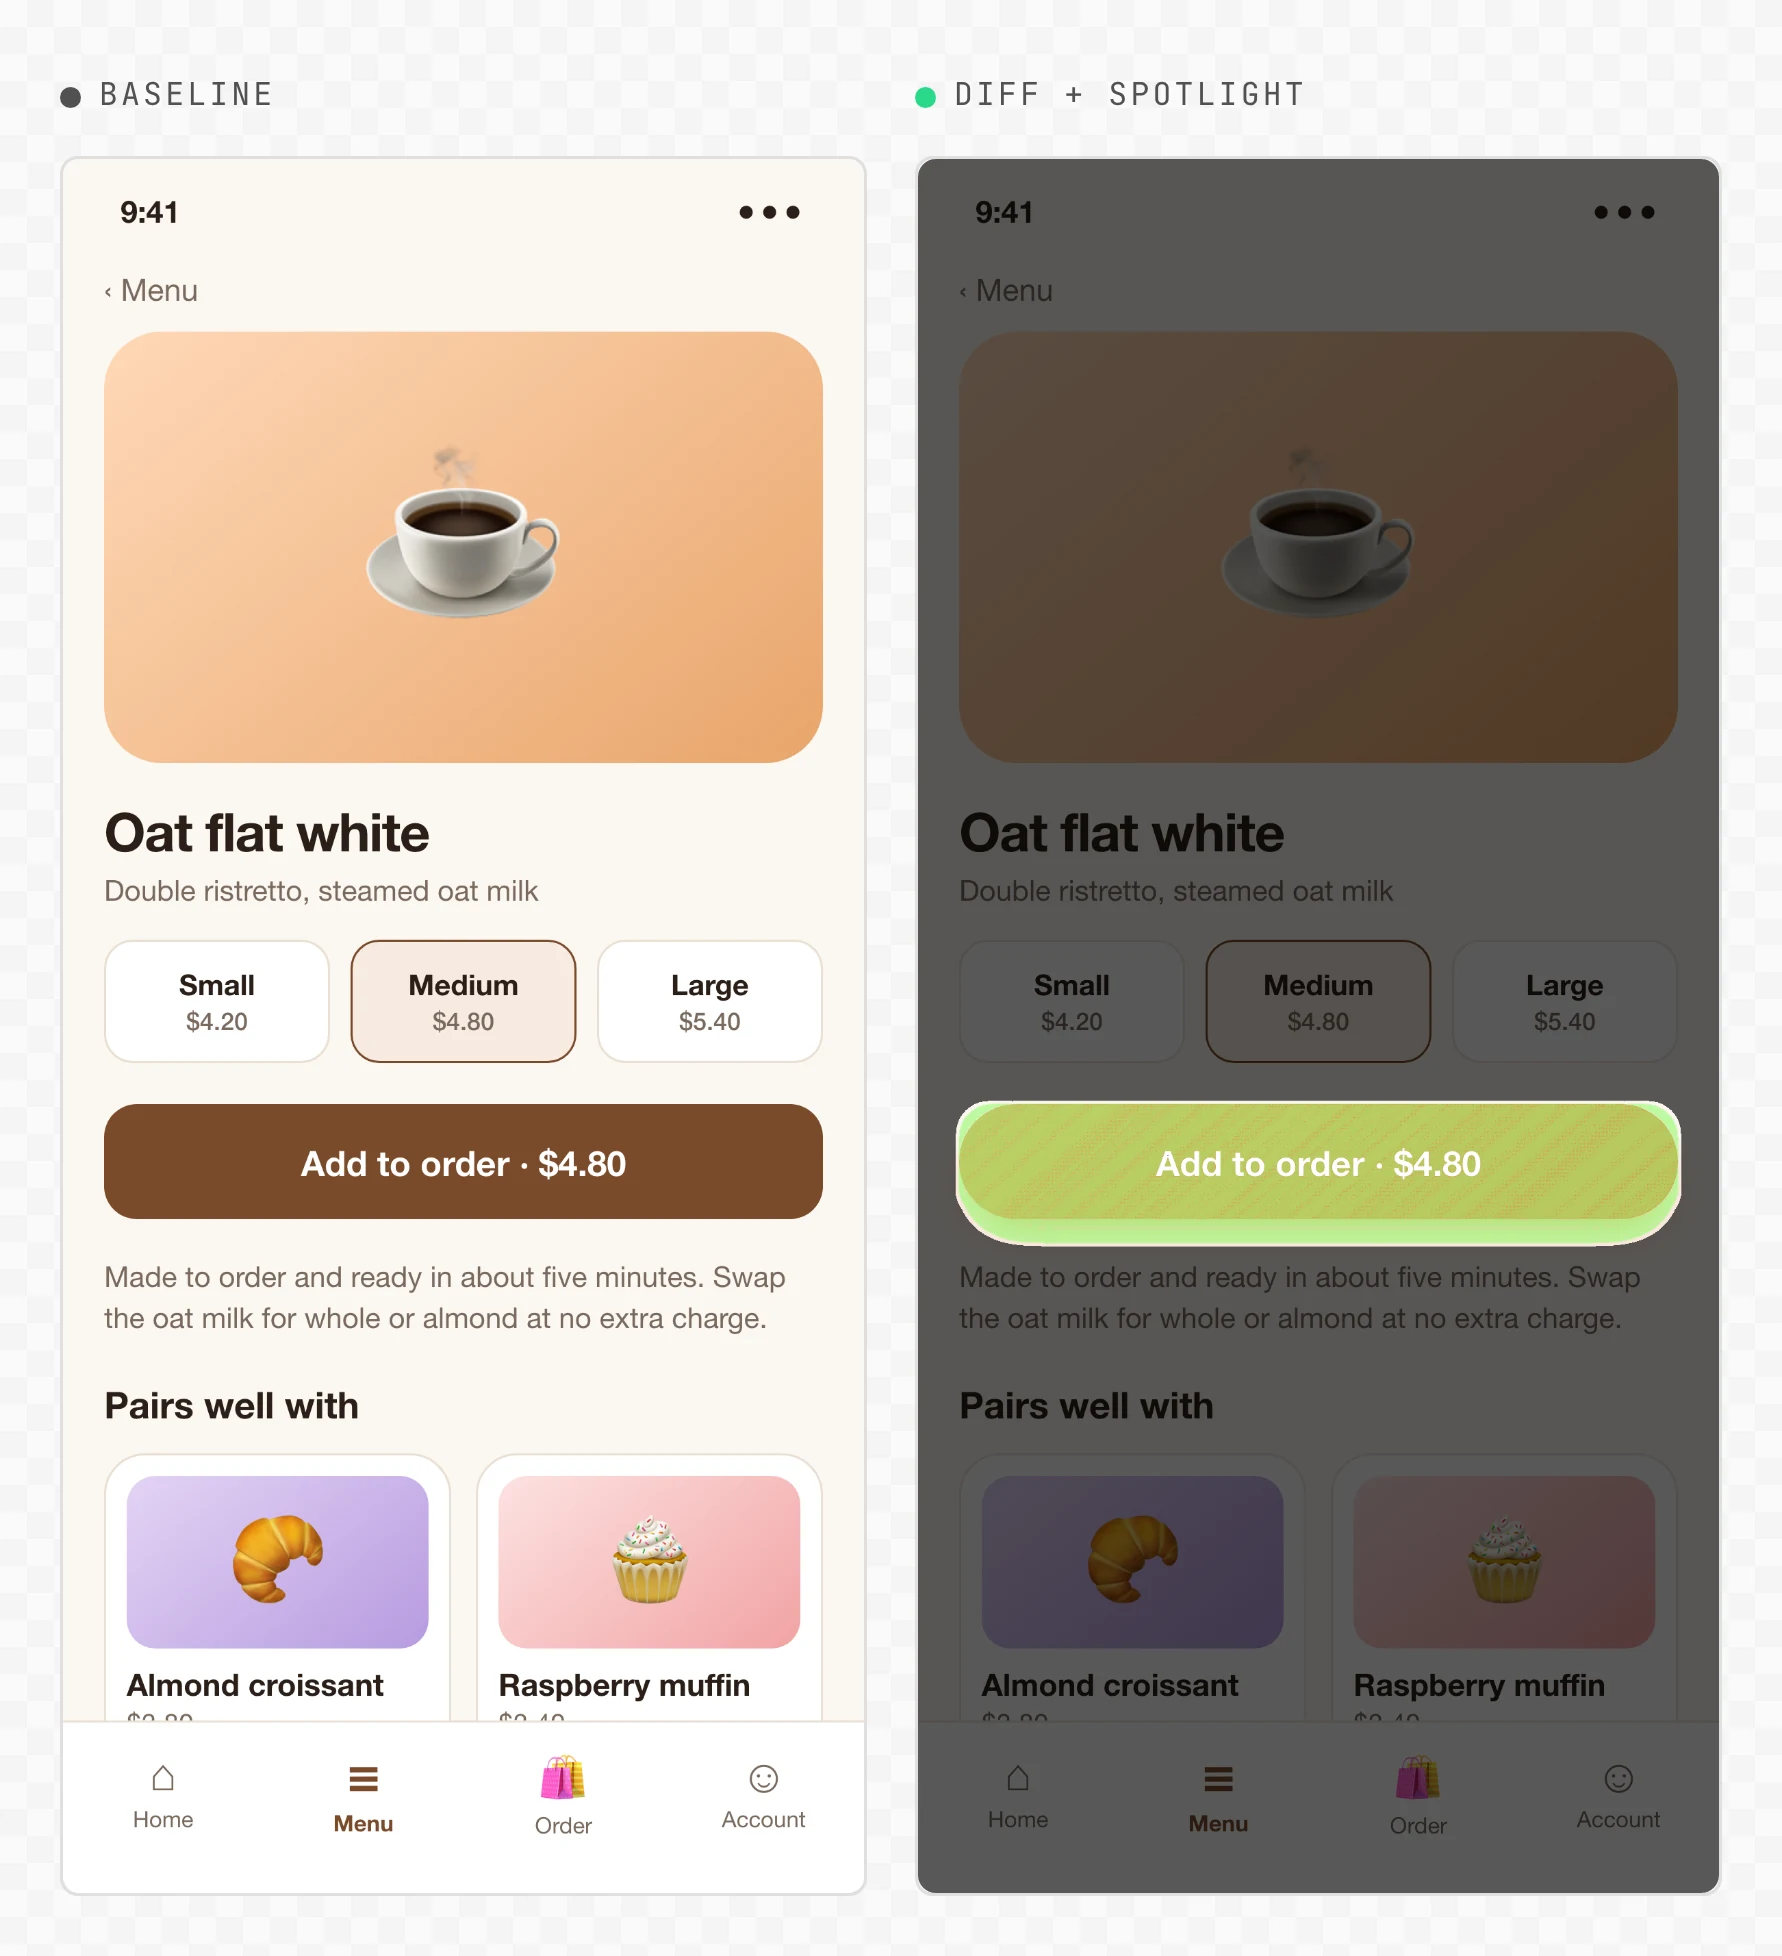
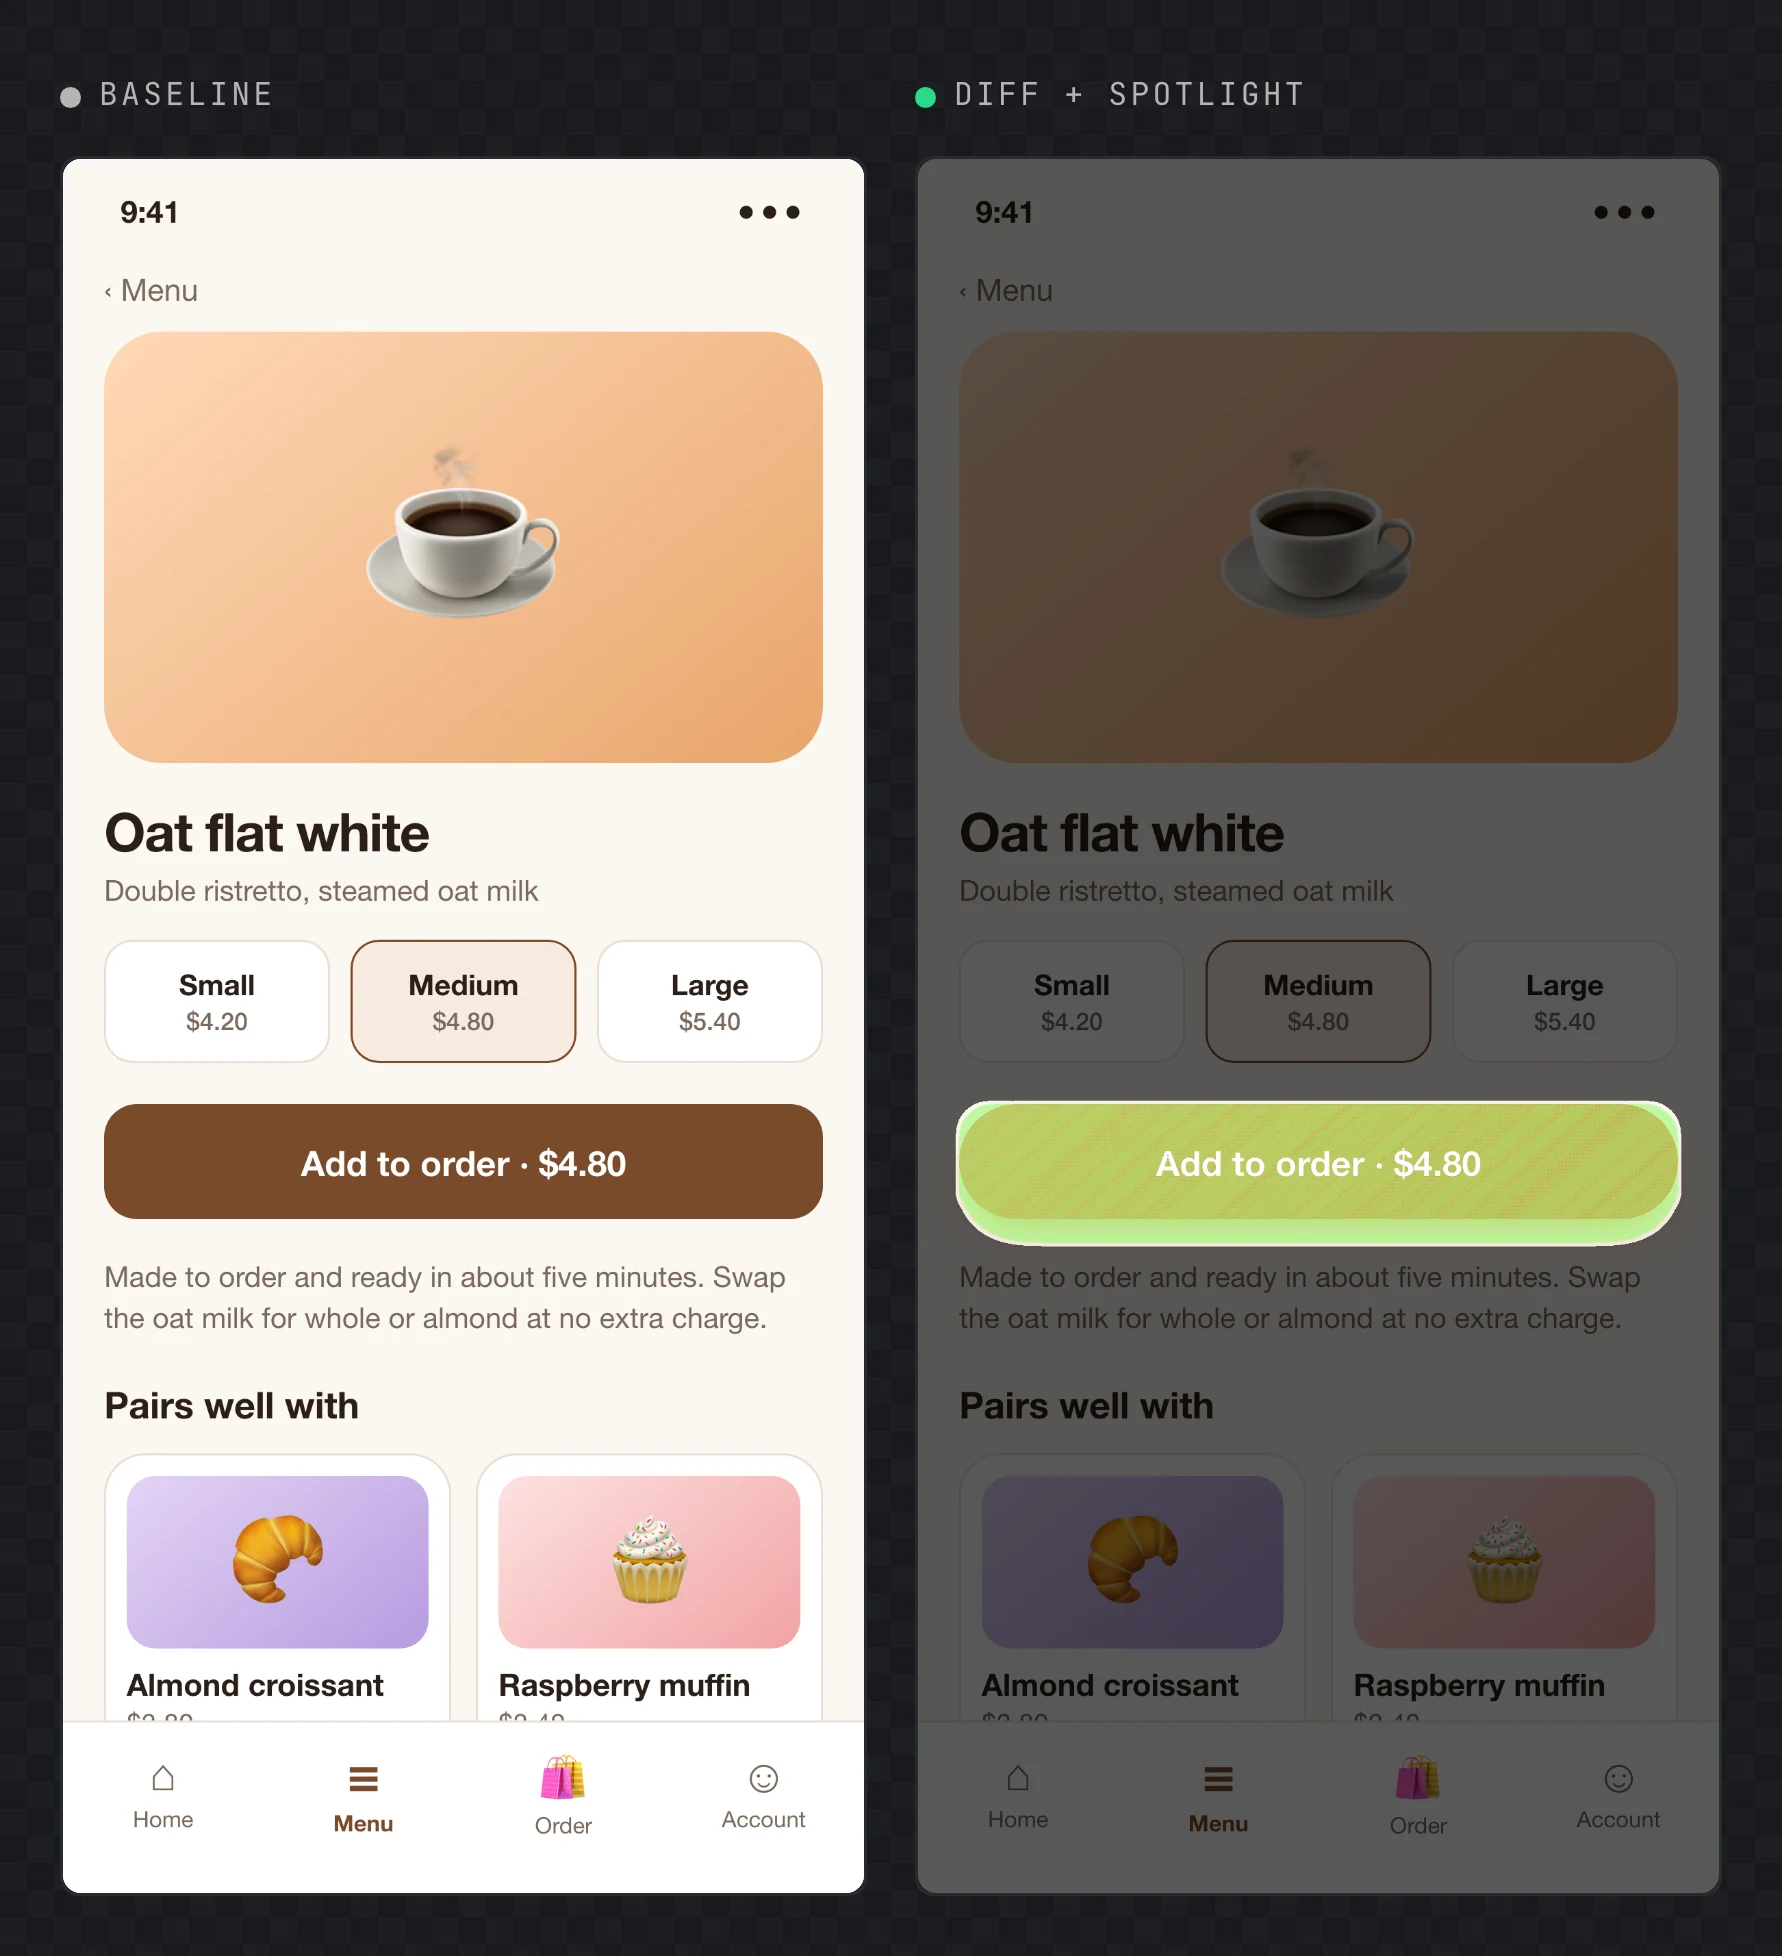
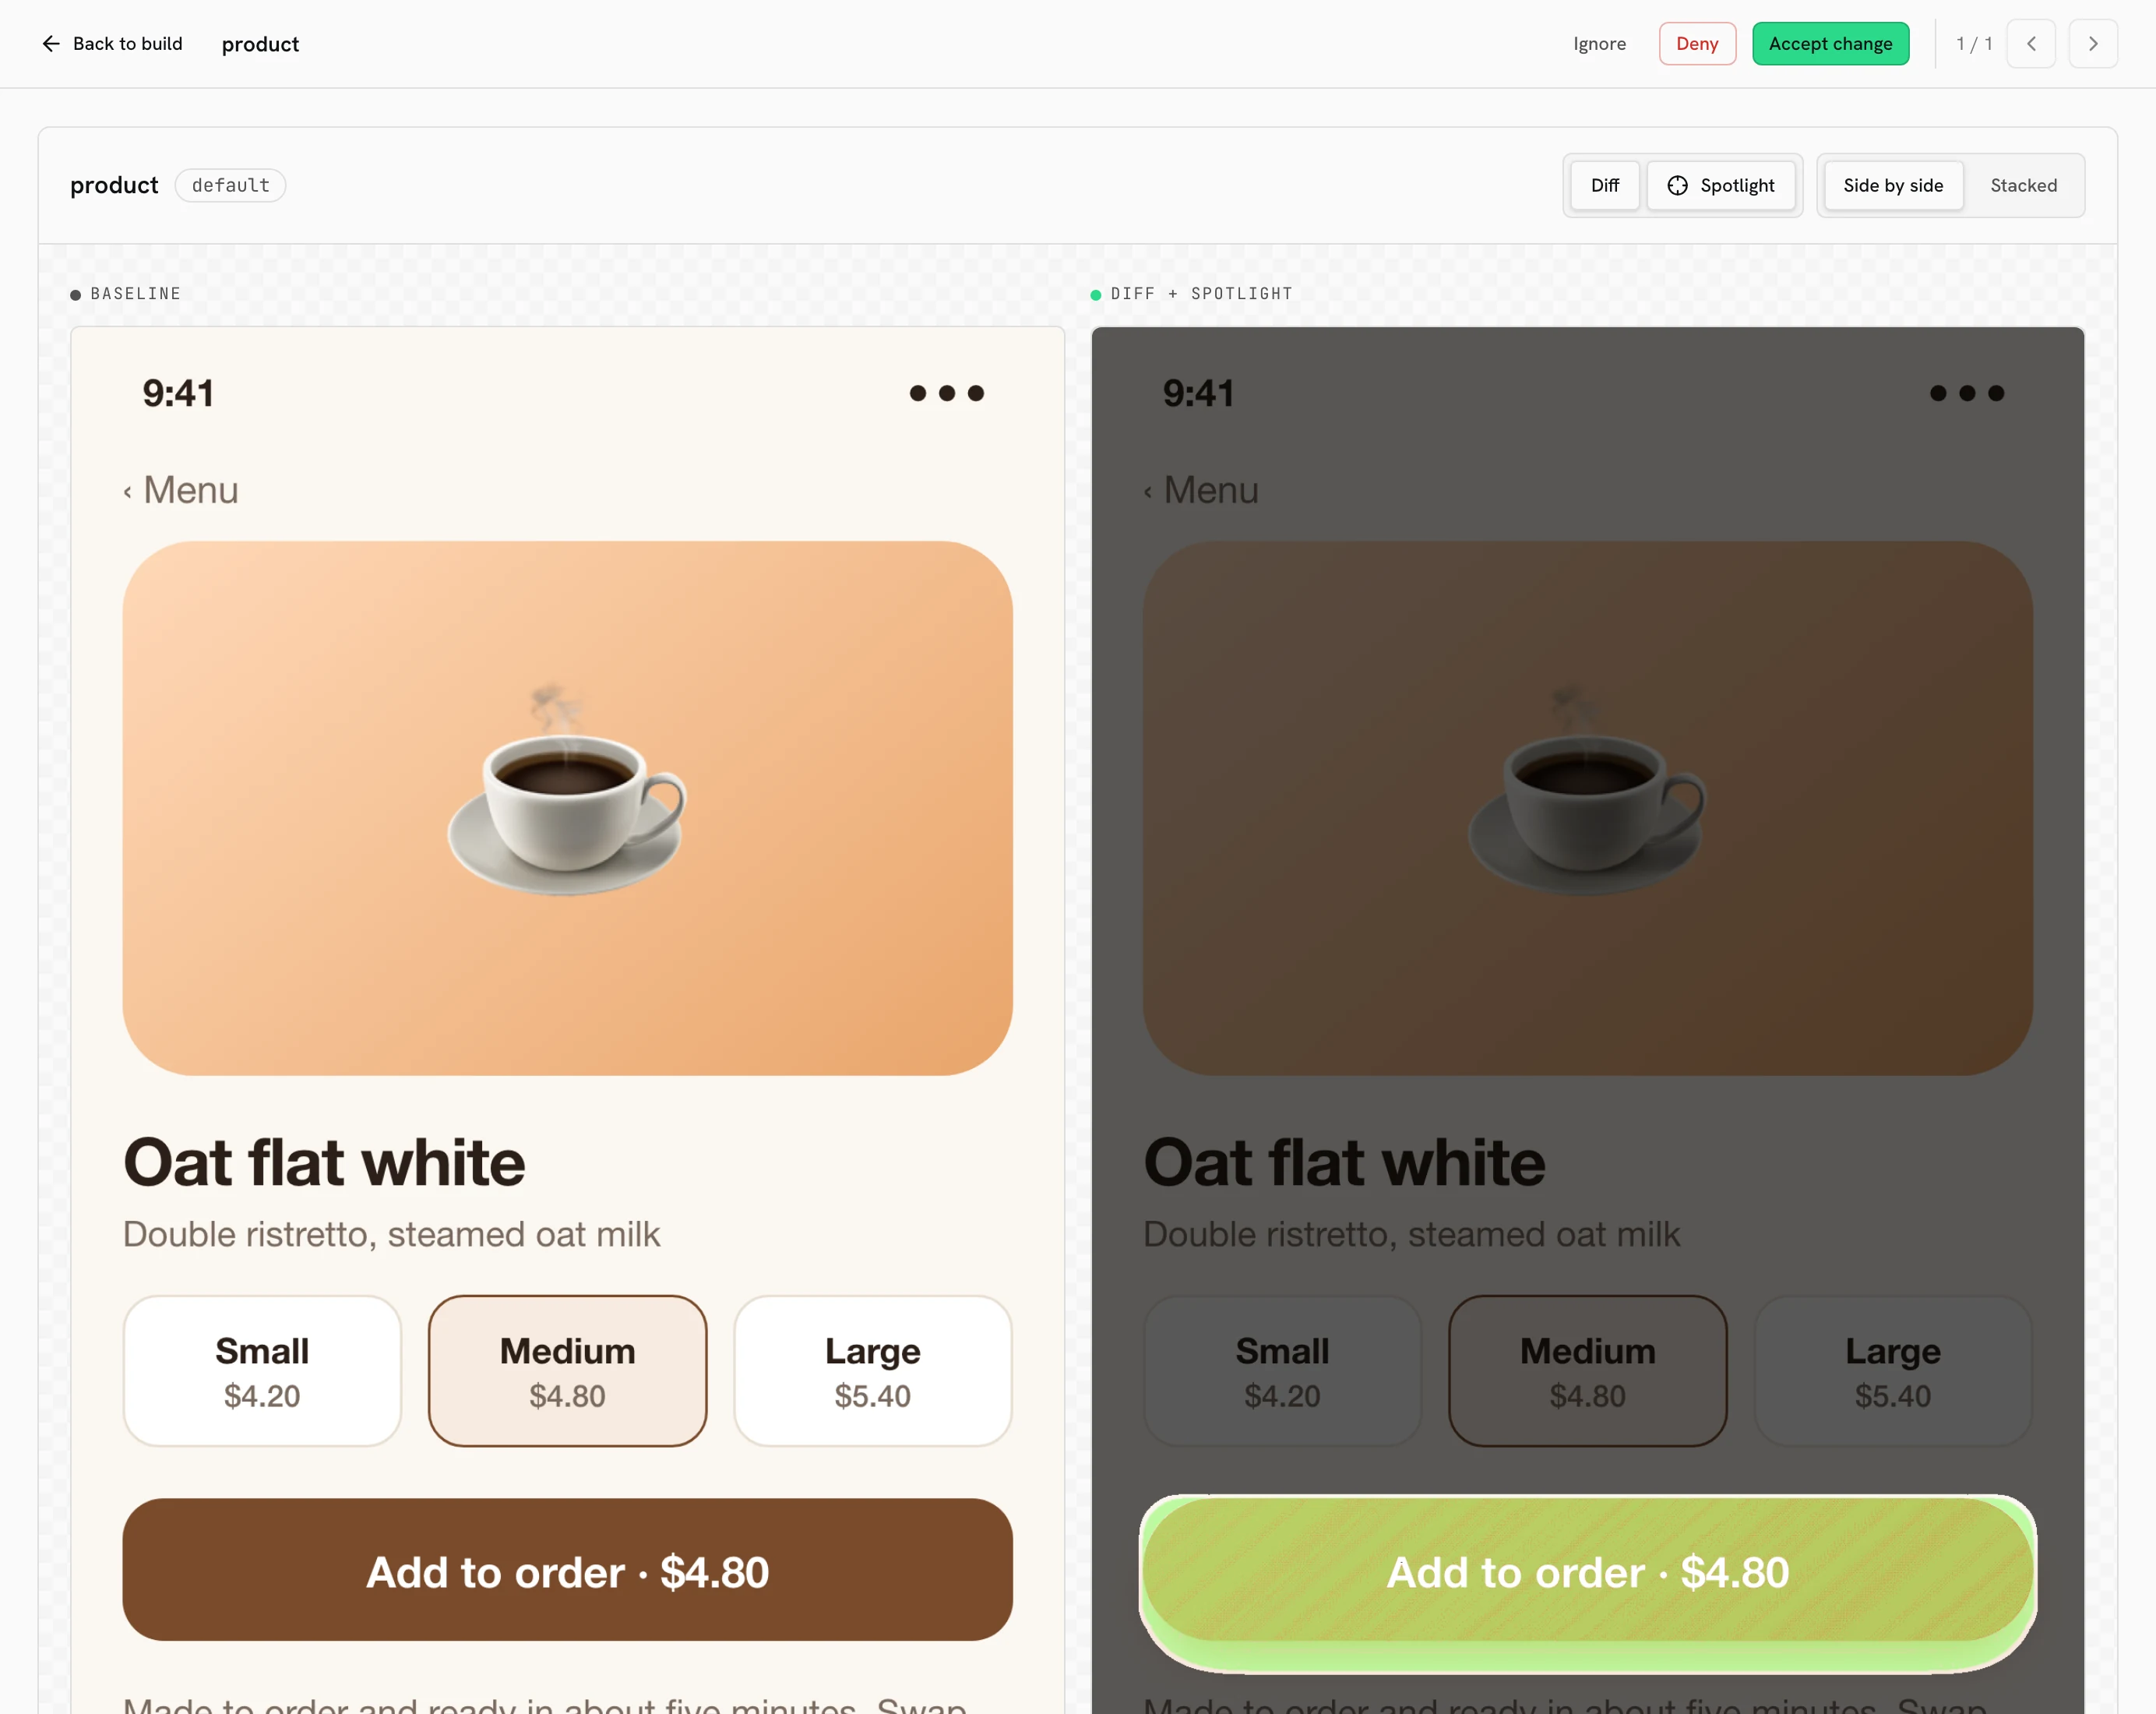
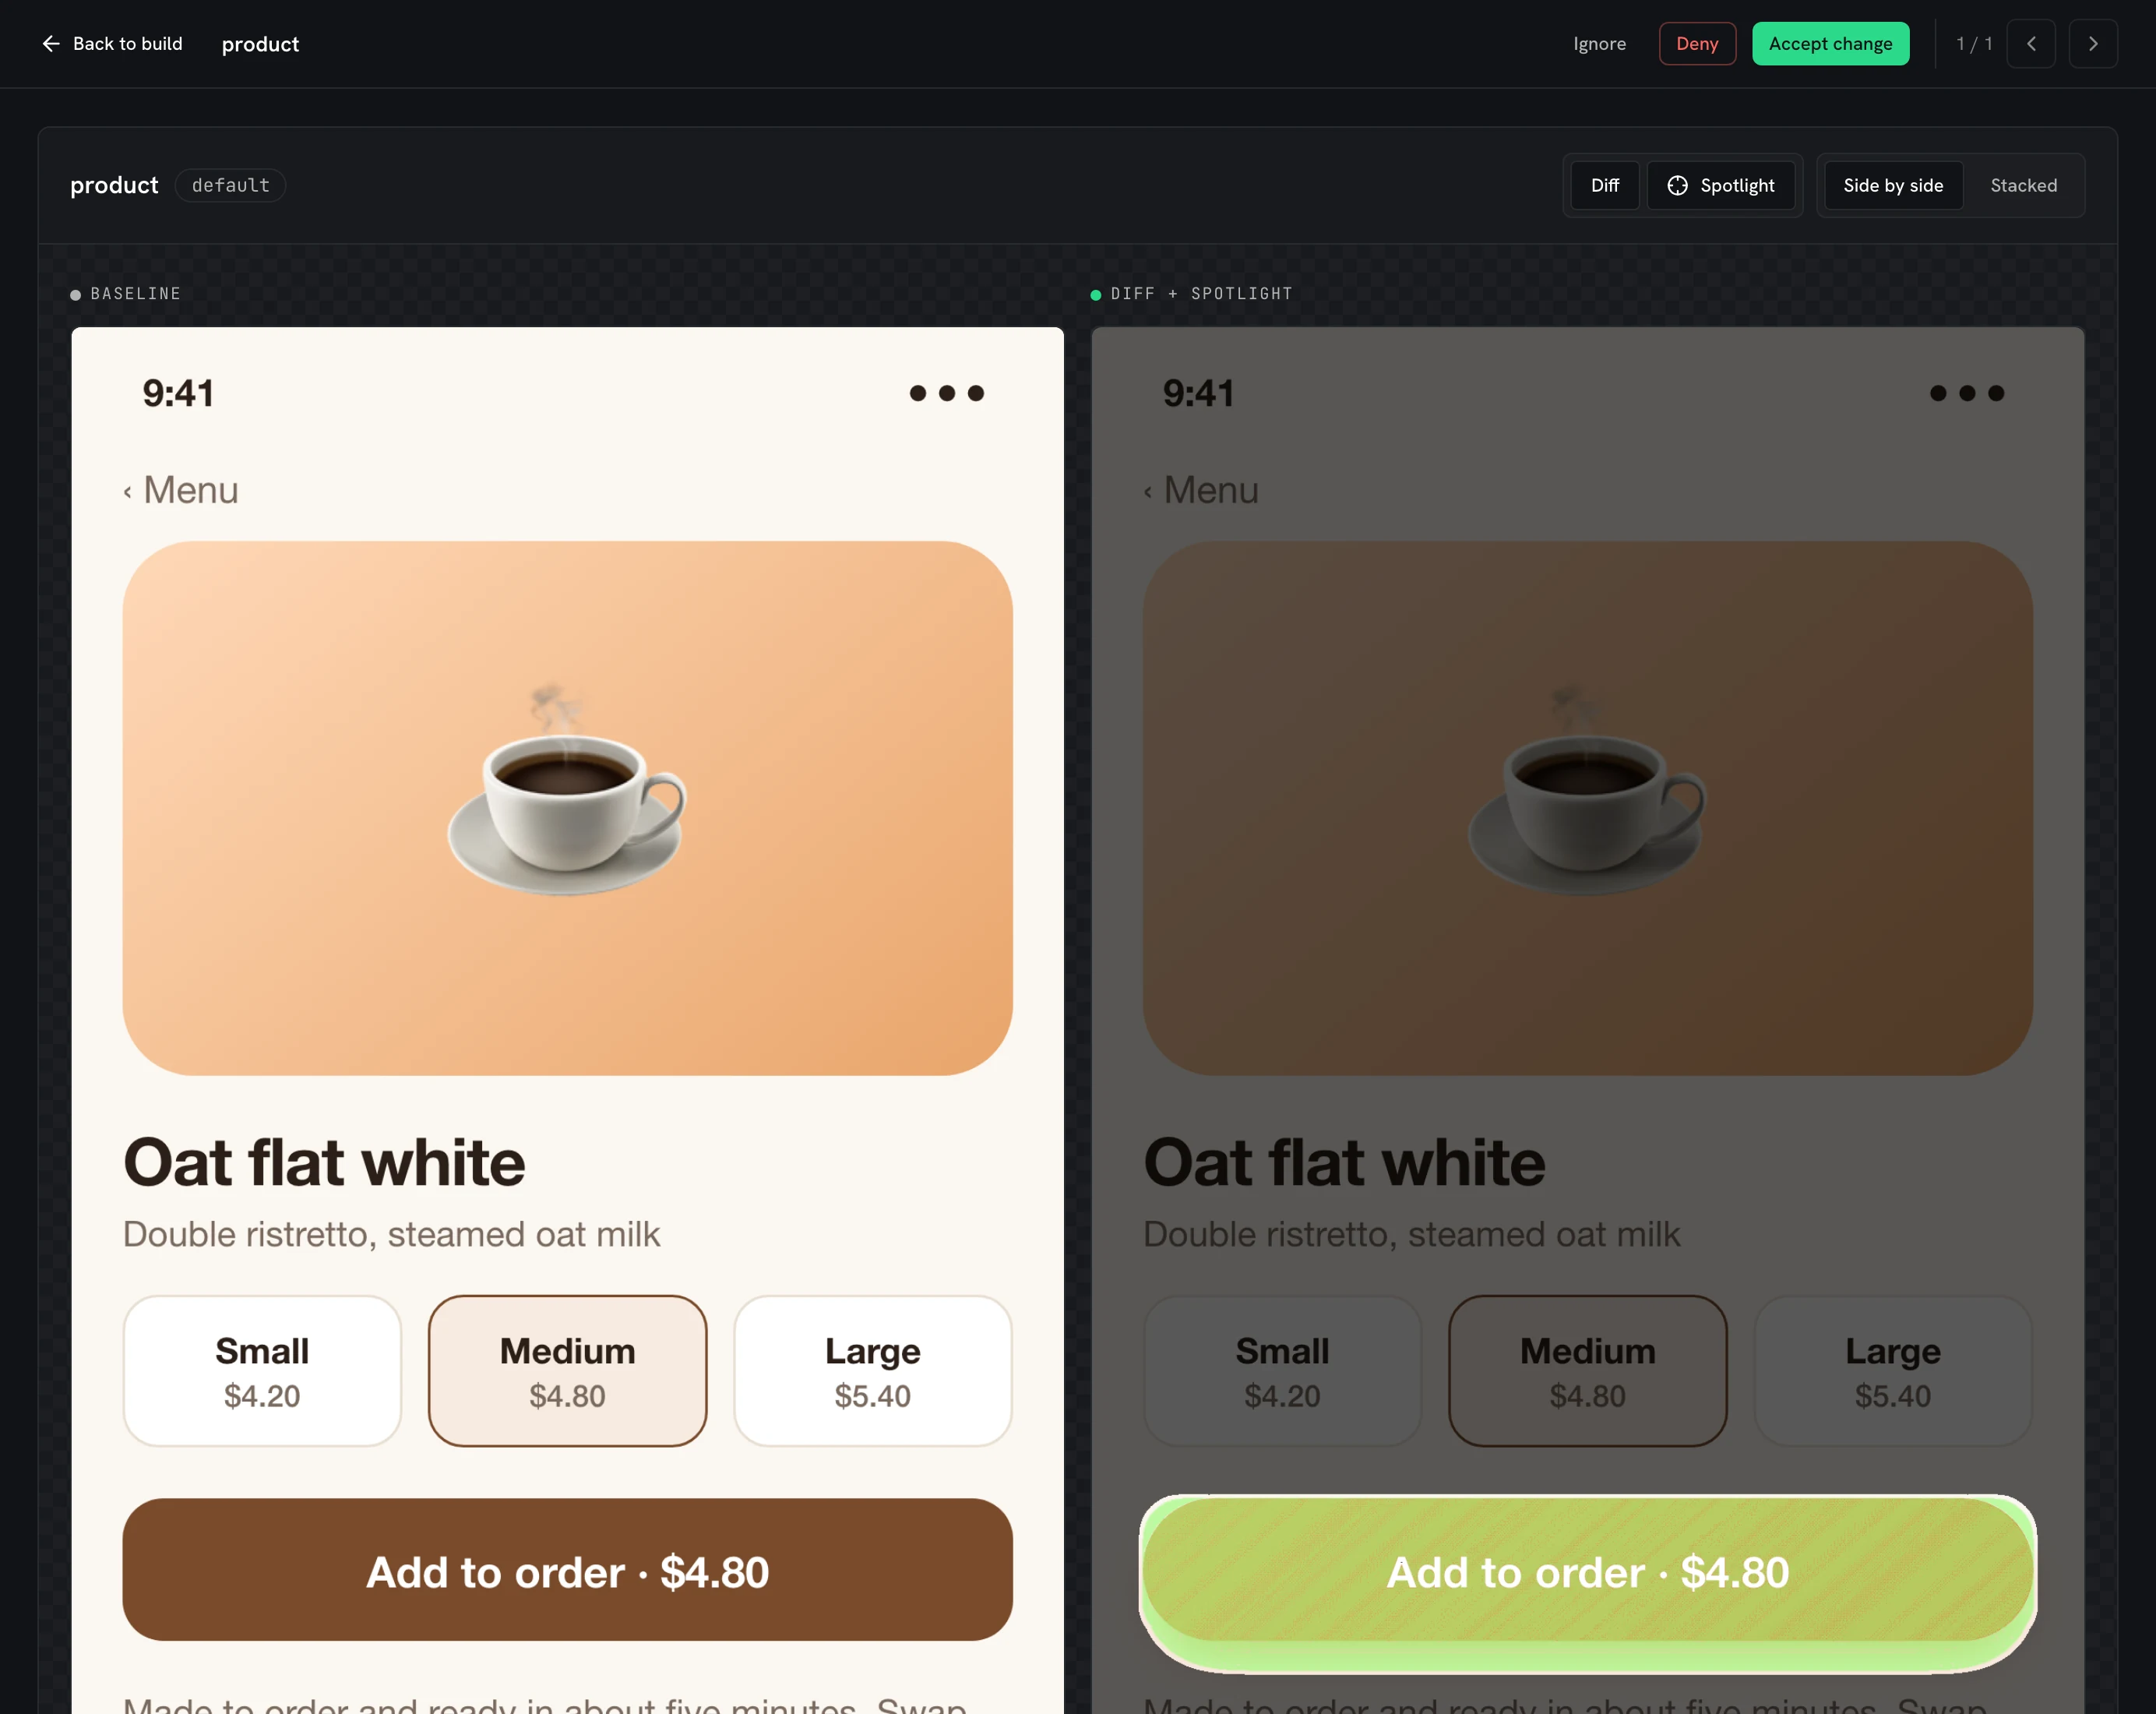
uiverify upload --screenshots, from a small demo coffee ordering app (drawn in HTML, not a simulator capture), reviewed in UI Verify. In this staged change the Add to order button went from a brown rounded rectangle to an orange pill, 6.10% of the screen's pixels changed, and Spotlight dims the rest of the screen so the button is the only thing lit.What is mobile app visual regression testing?
Mobile app visual regression testing compares a screenshot of each screen after a change against an approved baseline, so a change to the pixels shows up as a diff you review. Functional tests check that a button works and never see that it moved, lost its color or now overlaps the label; a visual test catches the layout, font or spacing change every assertion passes straight through.
A native screen cannot be rendered in a browser, so UI Verify does not try. Your own harness already produces the pixels, from a simulator, an emulator or a device. UI Verify takes those finished PNGs and manages everything after them: the baselines, the diff, the pull request check and the review.
How do you set up visual testing for a mobile app?
You need a project of type Custom screenshots and a tool that writes PNGs. There is no SDK to install. The React Native example is a small Expo app that produces a screenshot per screen with Maestro and uploads them with the command below.
1. Produce your screenshots
Run whatever already writes your screenshots into one directory: an XCUITest or Espresso run, a Maestro flow, a React Native snapshot step, or any script that saves PNGs. Each image's id is its path under that directory with the extension dropped, so checkout/mobile/cart.png becomes the stable key checkout/mobile/cart. Keep those paths steady and a screen always diffs against its own baseline.
2. Upload the directory
Upload with your project API key. Your first upload shows every screen as new; accept it and it becomes the baseline.
# your own harness writes PNGs to ./screenshots
UIVERIFY_API_KEY=your_key npx -y uiverify@1.8.0 upload --screenshots ./screenshots
3. Catch a change
Change something visible in a screen, such as a color or a label, regenerate the screenshots and upload again. UI Verify diffs the new build against the first and flags what moved. Open the build page it prints, where you accept or reject the change; accepting promotes the new screenshot to the baseline for that branch.
4. Run it on every pull request
Add the same upload to CI, on pull requests and on your default branch, after the step that writes your PNGs. Keep fetch-depth: 0 on checkout so the baseline resolves against your real branch history. The full GitHub Actions workflow is in the custom screenshots quickstart.
How does UI Verify compare to Maestro, snapshot libraries and hosted services?
Teams that visual-test a mobile app today use the comparison built into their test tool, a snapshot library that stores baselines in the repo, or a hosted service. They differ in where baselines live and where a change gets reviewed.
| UI Verify | Maestro assertScreenshot | swift-snapshot-testing and Paparazzi | |
|---|---|---|---|
| What it is | A service that diffs the PNGs your harness produced | A command in a Maestro flow that compares the screen to a reference image | Libraries that snapshot a view inside your iOS or Android tests |
| Where baselines live | Hosted, one per branch, resolved from git | A reference image your flow points at, usually made by an earlier takeScreenshot run | PNGs committed in your repo (__Snapshots__ for iOS, src/test/snapshots for Paparazzi) |
| What fails a check | A changed screen waits in the review queue until you, or your agent, accept or reject it | The match falls below a threshold percentage (95 by default) | The test fails when a rendered image differs from its saved one |
| Where you review a change | A check and a comment on the pull request, and the review queue | The flow's run output, with a diff generated on failure | Xcode's report navigator for iOS, an HTML report for Paparazzi |
| Updating a baseline | Accept in the dashboard or from your agent; merging advances it | Create the reference again with takeScreenshot | Re-record and commit the new PNGs |
| Review from a coding agent | MCP tools return each diff and accept or reject it | The agent reads the run output | The agent reads the failing test and the PNGs on disk |
| Price | Free for 10,000 snapshots a month (50,000 for open source); paid plans include more, then per snapshot | Free, it is part of Maestro | Free, they run in your CI |
Hosted services take the same screenshots and review them online. App Percy tests native apps from Appium, Espresso, Maestro and XCUITest through its SDK and renders on its own infrastructure, and its bring-your-own-screenshots upload is documented as an Alpha feature that needs a folder of device metadata. Applitools' Eyes Images SDKs can check an image file you produced. Argos uploads a folder of PNGs from any tool. Chromatic's React Native support captures Storybook stories on a hosted iOS simulator and Android emulator, and is enabled through Chromatic rather than self-serve. For the full comparisons, see UI Verify vs Percy, UI Verify vs Applitools, UI Verify vs Argos and UI Verify vs Chromatic.
Sources: App Percy overview, App Percy image upload, Applitools Eyes Images for Swift, Argos CLI docs, Chromatic React Native docs, checked 2026-11-02.
What does UI Verify add to mobile testing?
- Keep your harness. UI Verify renders nothing and installs nothing in your app. Maestro, XCUITest, Espresso, Appium or a script keeps producing the images, and one command uploads them.
- Your coding agent checks its own UI work. The agent regenerates the screenshots it touched, uploads them, and reads the diffs over MCP, so it sees what its change did to the UI before it opens a pull request. See Check visual changes mid-edit.
- Every pull request is checked again. UI Verify posts a check and a comment with the diff on the pull request, and a change waits in the review queue until you, or your agent, accept or reject it.
- No screenshots in your repo. Baselines are hosted, one per branch, resolved from git, so there is nothing to re-record and commit. See baselines.
- Upload only what changed, or everything. You decide which screens to send. A screen you leave out keeps its baseline untouched, so a change that touches two screens can upload two PNGs.
- An AI judge on each change. Each change is labeled an intended change or a likely regression, with the reason. See the AI judge.
When is something else the better choice for a mobile app?
Because UI Verify diffs images it did not take, determinism is on your side of the line: pin the device, the locale and any live data when your harness captures, and hide anything that changes between runs, such as a clock. A library that snapshots one view inside a unit test, like swift-snapshot-testing or Paparazzi, is simpler when the whole suite runs in one environment and you are happy to commit the baselines.
A hosted service that also runs your app across a grid of devices, such as App Percy or Applitools' Native Mobile Grid, is the better fit when you need that capture infrastructure as well as the diff. UI Verify fits when your own harness already produces the screenshots and you want them diffed, reviewed by your coding agent and checked on every pull request.
Frequently asked questions
Which tools can produce the screenshots?
Any of them. Maestro, XCUITest, Espresso, Appium, Detox or a plain script all work, because UI Verify only reads the PNG files you upload. Run whatever already writes your screenshots into a directory and point uiverify upload --screenshots at it.
Does it work with React Native?
Yes. A React Native app produces screenshots the same way any native app does, and UI Verify diffs them. The React Native example is an Expo app that captures a screenshot per screen with Maestro and uploads them.
Does it work for desktop apps?
Yes. The upload works for any app whose test run writes PNGs, so a macOS, Windows, Linux or Flutter desktop app works the same way as a phone app. Capture each window or screen to a file, keep the paths stable, and point uiverify upload --screenshots at the directory.
Do I need a simulator or a browser?
UI Verify needs neither: it renders nothing and replays nothing. Your own harness runs the simulator, emulator or device and writes the PNGs, and UI Verify takes it from there.
How do I keep mobile screenshots stable between runs?
Pin what your harness controls: the device model, the OS version, the locale, the time and any live data. UI Verify has no page to mask regions on, so hide or freeze anything that changes between runs before the screenshot is taken.
Do I upload every screenshot on every run?
No. You decide which screens to send. Upload the whole set and every screen is diffed; upload only the screens a change touched and the rest keep their existing baselines.
How does UI Verify match a screenshot to its baseline?
By its path under the uploaded directory, with the extension dropped. checkout/mobile/cart.png is the stable key checkout/mobile/cart, so keep paths steady across runs and a screen always diffs against its own baseline.
How much does mobile visual testing with UI Verify cost?
It is free for 10,000 snapshots a month, and 50,000 a month for open-source projects. A snapshot is one uploaded screenshot. See snapshot billing.
Can my coding agent set it up?
Yes. The Set up visual testing skill wires the upload and CI, and the custom screenshots quickstart opens with a prompt you can paste into your agent.
Guides and posts
Visual-test your mobile app today
Upload the screenshots you already produce, and your next pull request is checked. Free for 10,000 snapshots a month, 50,000 for open source.