Visual testing setup: no new tests to write
Visual testing setup means reusing the tests you already have. Your Storybook stories, Playwright tests, or Vitest browser tests become the visual tests.
 Igor LuchenkovBuilding UI Verify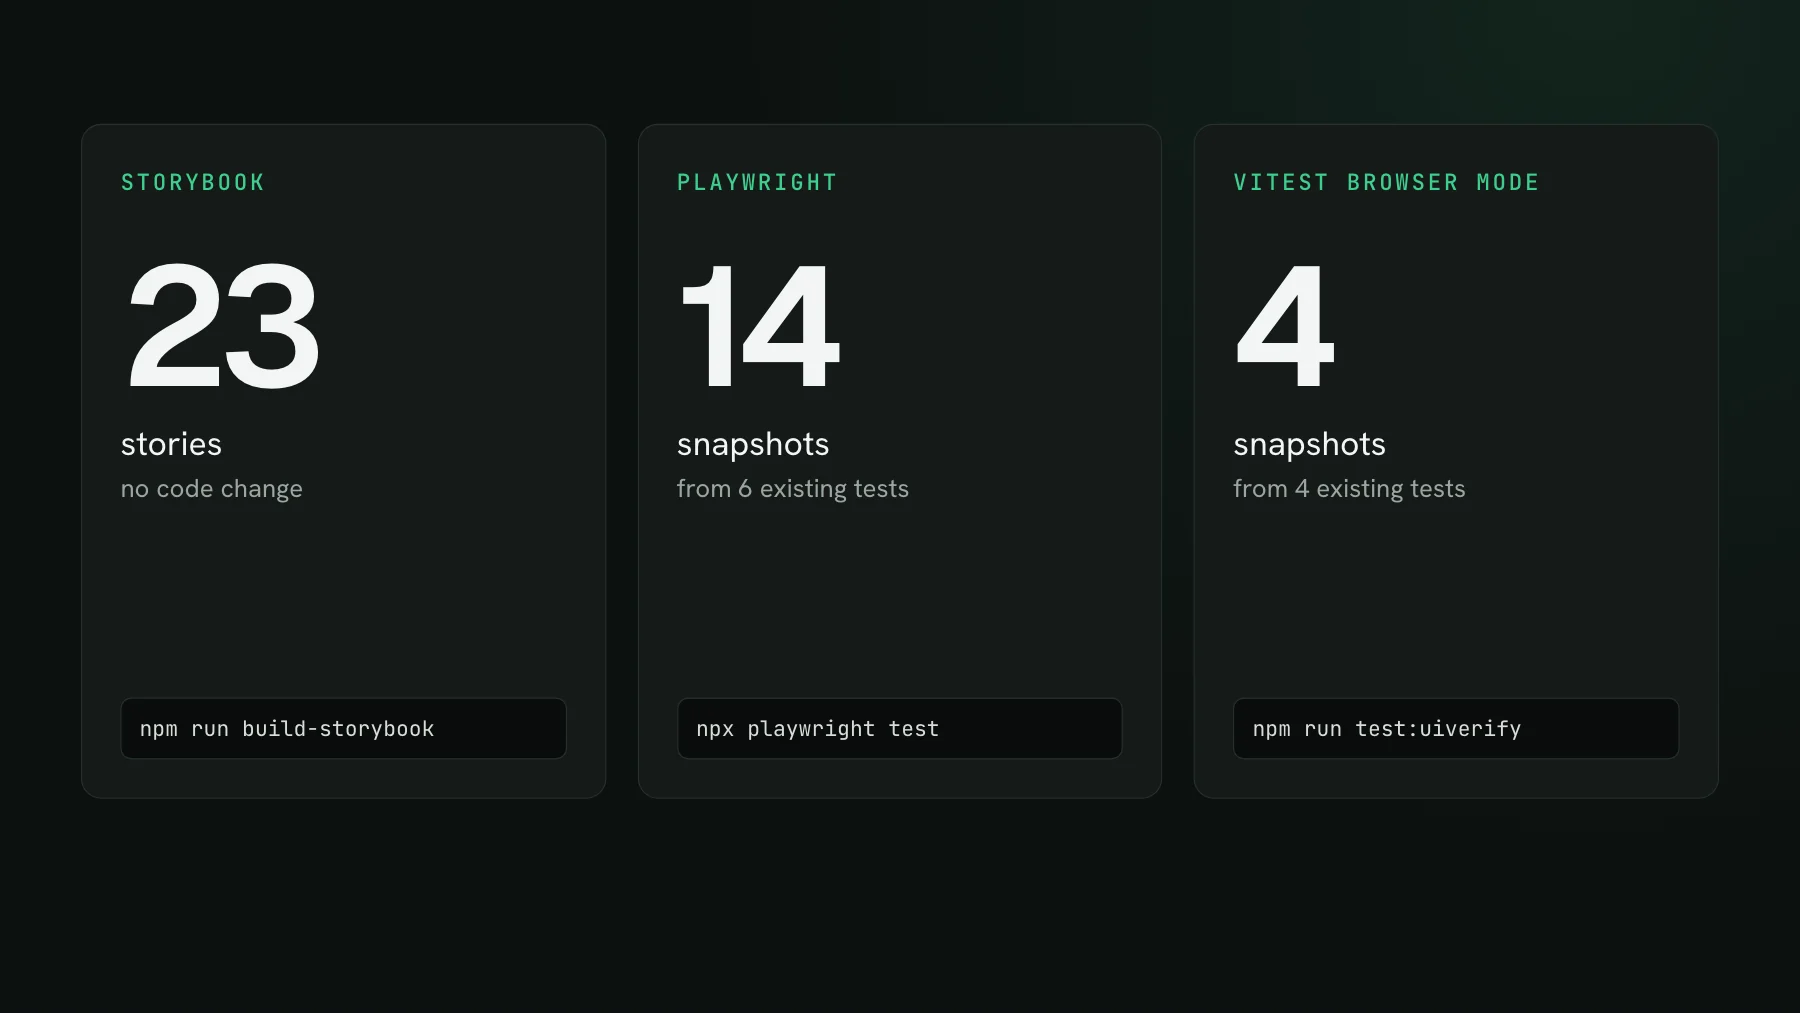
On this page
The most common question I get before anyone signs up is a version of the same worry: how much work is the setup? And under it sits a specific confusion that most visual-testing docs never clear up - does adopting this mean I have to sit down and write a whole new suite of screenshot tests, or does it hook into the tests I already have? The answer is the second one, and it deserves to be the first sentence on the page instead of buried five scrolls down. If you have Storybook stories, Playwright tests, or Vitest browser-mode component tests, you already wrote your visual tests. You just have not pointed a diff at them yet.
Visual testing setup, defined
Visual testing setup is the work of turning tests you already run into a screenshot check on every pull request. It is not authoring new test cases. A visual test is a rendered UI state plus a baseline to diff it against, and your existing tests already produce the rendered states: a Storybook story renders a component in a known state, a Playwright test drives a real page to a known screen, a Vitest browser-mode test mounts a component. Setup captures what those tests already render, stores the first capture as a baseline, and diffs every later run against it. The states are yours; the capture, baseline, and diff are what you are adding.
That reframe matters because it changes the cost. Authoring a parallel snapshot suite is a project you schedule. Reusing the tests you have is a config change you finish in an afternoon. Below is exactly what that change is for each of the three surfaces UI Verify captures - pick the one you already use.
Every path shares one prerequisite: a project API key. Sign up, create a project, and store its key (it starts with uv_proj_) in CI as a secret named UIVERIFY_API_KEY. That is the only new credential in any of these flows.
Storybook: your stories are the capture targets
If you have Storybook, you have the least to do, because there is no code change at all. Every story is a UI state worth a screenshot. You build Storybook the way you already do, then upload the static build - UI Verify renders each story, captures it, and diffs it against its baseline. In our Shoppy demo that is 23 stories, captured without touching a story file.
npm run build-storybook   # outputs ./storybook-static
UIVERIFY_API_KEY=your_key npx -y uiverify upload --static-dir ./storybook-static
The first run captures every story as new and flags it for review; accept them and those become your baselines. After that, each run reports only what moved. Play functions carry over too - a story with an interaction test runs its steps first, and the snapshot captures the settled result. The full walkthrough, including the CI workflow, is the Storybook quickstart. If you are leaving Chromatic, the migration is a CI swap with your stories untouched: Storybook visual testing without Chromatic covers it end to end.
Playwright: swap one import
No Storybook? If you already drive real pages with Playwright, those tests are your visual tests. Install the capture SDK and change the line your specs import test and expect from. That import swap is the whole code change - it is what records an archive of what each page actually rendered, which UI Verify then replays and screenshots deterministically.
import { test, expect } from "@uiverify/playwright"; // was "@playwright/test"npm i -D @uiverify/playwright
npx playwright test # writes ./uiverify-archive
UIVERIFY_API_KEY=your_key npx -y uiverify upload --static-dir ./uiverify-archiveYour test bodies do not change. The same specs that were checking behavior now also archive their final UI state, and where a flow has more than one screen worth capturing, you can name each state with uiVerify.snapshot("cart") instead. This is how you visually test a Next.js app, a marketing site, or a live staging URL with no component framework at all. In our Shoppy demo, the six existing Playwright tests archive 14 snapshots in 8.5 seconds. See the Playwright quickstart.
screens.spec.ts captures each route at desktop and mobile, and the flow test adds four named checkpoints.Vitest: add one plugin
Running component tests in Vitest browser mode? Add the capture plugin to your vitest.config.ts and your browser-mode tests start archiving the DOM they render. It is the same archive-replay engine the Playwright path uses, pointed at components instead of pages.
import { uiverifyPlugin } from "@uiverify/vitest/plugin";

export default defineConfig({
  plugins: [uiverifyPlugin()], // the one line you add
  test: {
    browser: { enabled: true, provider: playwright(), instances: [{ browser: "chromium" }] },
  },
});npm i -D @uiverify/vitest @vitest/browser-playwright
npx vitest run # writes ./uiverify-archive
UIVERIFY_API_KEY=your_key npx -y uiverify upload --static-dir ./uiverify-archiveAwait your render() calls so the DOM is committed before capture, and every browser-mode test archives its final state. A test that calls takeSnapshot() archives those named snapshots instead. Full config and CI in the Vitest quickstart.
Three surfaces, one shape
Every path lands in the same place: your existing tests write what they render, the CLI uploads it, and UI Verify diffs each state on the pull request. The only difference is which tests you already have.
| If you already have | The setup step | What becomes a visual test |
|---|---|---|
| Storybook | Build and upload - no code change | Every story |
| Playwright tests | Swap the import to @uiverify/playwright | Every page each test drives |
| Vitest browser tests | Add uiverifyPlugin() to the config | Every browser-mode component render |
Why reuse beats authoring a parallel suite
There is a real reason tools that make you author snapshot calls - a percySnapshot() or a dedicated visual spec sprinkled through the codebase - cost more than they look. A parallel suite is a second set of tests to keep in sync with the first. Rename a component, restructure a page, and now two places know about it. Reusing the tests you already maintain means there is one source of UI states, and it is the one your team already updates when the UI changes. The visual coverage tracks the code for free.
I saw how much this matters on a call with a platform lead at a large product org. Their team had solid Storybook coverage, but a separate group had started pushing to visually check what they described as potentially everything the company ships - arbitrary product pages, not just components in isolation. The instinct was that this meant standing up a whole new testing effort for a whole new surface. It did not. The product pages were already driven in a browser by tests they had; the components already had stories. Both were capture targets they had written and forgotten counted as tests. The work was pointing a diff at them, not writing them.
What setup does not require
It is worth being explicit about the things people brace for that are not part of this:
- No new test cases. You do not author screenshot assertions. Your stories, pages, and component tests already define the states.
- No baseline images in your repo. Baselines are hosted and per branch, so there are no PNGs to commit and no per-OS files to juggle.
- No browsers or render farm to run. Capture and diff happen in the cloud after the upload; your CI stays one step.
- No migration rewrite. Moving off another tool is a CI swap - your tests stay exactly as they are.
The one thing you do add is review: on the first run you accept the captures that become your baselines, and after that you review the changes a PR introduces. An AI judge takes the first pass, labeling each change a likely regression or an intended change, and your coding agent can triage and accept over MCP - so the review cost does not scale with commit volume. That is the loop the agent-era guide walks through.
Where to start
Pick the surface you already test and follow its quickstart: Storybook, Playwright, or Vitest. On a large suite, add --only-changed to the upload so a small PR re-renders only the states it affects and carries the rest forward. If you would rather not click through the config yourself, hand the setup skill to your coding agent and it wires the whole thing up, determinism checklist included. Weighing whether to adopt a tool at all versus building capture in-house? Visual testing: build vs buy runs the numbers, and if you are rethinking where visual coverage sits in your test strategy, invert the testing pyramid makes the case for leaning on it. Either way, the setup is not the part to dread. The tests are already written.
Set it up with the tests you already have
UI Verify turns your existing Storybook stories, Playwright tests, and Vitest browser-mode components into a visual check on every pull request. No new SDK to author against - swap an import or point the CLI at your build, and an AI judge tells an intended change from a regression.
Start for freeNo credit card required.
Set up visual testing
From no visual tests to a green check on every pull request.